
Terminal Server Has Exceeded the Maximum Number of Allowed Connections
1. Open RDP connection (Start->run->mstsc)
2. Type the hostname or IP address with additional parameter /admin as shown below
10.2.10.27 /admin
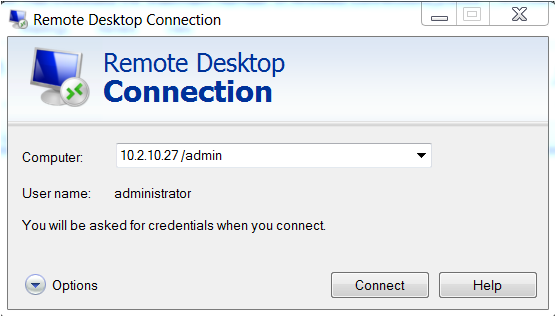
3. Now you can access the console login of the server, which disconnects other users.
A temporary profile is loaded after you log on to a Windows Vista-based system
This problem occurs if the current user’s profile was accidentally deleted from the system.
To resolve this problem, follow these steps:
1. Log on to the system by using an administrative user account other than the user account that is experiencing the problem. and Back up all data in the current user’s profile folder if the profile folder still exists, and then delete the profile folder. By default, the profile resides in the following location:
%SystemDrive%\Users\UserNameClick
2. Start, type regedit in the Start Search box, and then press ENTER.
If you are prompted for an administrator password or for confirmation, type your password, or click Continue.
3. Locate the following registry subkey:
HKEY_LOCAL_MACHINE\SOFTWARE\Microsoft\Windows NT\CurrentVersion\ProfileList
4. Under the ProfileList subkey, delete the subkey that is named SID.bak.
Note SID is a placeholder for the security identifier (SID) of the user account that is experiencing the problem. The SID.bak subkey should contain a ProfileImagePath registry entry that points to the original profile folder of the user account that is experiencing the problem.
5. Exit Registry Editor.
6. Log off the system and log on to the system again.
7. After you log on to the system, the profile folder is re-created.
Copy a Folder to Another Folder and Retain its Permissions in windows
1. Click Start, and then click Run.
2. In the Open box, type cmd, and then click OK.
3. Type xcopy sourcedestination /O /X /E /H /K and then press ENTER, where source is the source path for the files to be copied, and destination is the destination path for the files.
Example
Type xcopy c:\olddocs c:\newdocs /O /X /E /H /K, and then press ENTER, where olddocs is the source folder and newdocs is the destination folder
Extend windows partition using diskpart command
1. Start diskpart. (start->Run->diskpart)
2. Then type “list volumes” to see which volume you should choose to extend the required drive. you can get the unallocated space from Disk management.
3. Identify the volume no from step 2.
4. Next type”select volume 5” and the command will tell you it is selected.
5. Once the drive is selected, you can type “extend” to extend the selected partition..
Steps to change default RDP port 3389 on windows
1. Start Registry Editor. (start->Run->regedit)
2. Locate and then click the following registry subkey: HKEY_LOCAL_MACHINE\System\CurrentControlSet\Control\TerminalServer\WinStations\RDP-Tcp\PortNumber
3. On the Edit menu, click Modify, and then click Decimal.
4. Type the new port number, and then click OK.
5. Quit Registry Editor.
Xenserver does not reclaim space after deleting VDI or Snapshot.
The exact cause for the above error has already been mentioned in my older blog
https://sysadmino.wordpress.com/2014/03/03/creating-vms-from-templates-or-using-fast-clone-method-in-xenserver-creates-a-link-to-the-original-disk/
To Solve this issue, do the following steps
Step 1: scan your SR for orphaned VHDs
vhd-util scan -f -m “VHD-*” -l “VG_XenStorage-<uuid_of_SR>” –p
for example:
[root@MytestCase]# vhd-util scan -f -m “VHD-*” -l “VG_XenStorage-99dfb8a9-2dcc-b610-45ca-2010fb0e475b” -p
vhd=VHD-75fa7730-091d-4d6b-bcae-79ae11efa79d capacity=21474836480 size=21525168128 hidden=1 parent=none
vhd=VHD-7ec19bd2-1c86-44c0-83f1-aab4c8bd7e41 capacity=26843545600 size=26902265856 hidden=1 parent=none
vhd=VHD-902f17f1-c254-4cde-8519-a004b8721581 capacity=64424509440 size=64558727168 hidden=1 parent=none
vhd=VHD-94bc9c71-6e33-4281-9c1d-9ecd6f1da4c0 capacity=16106127360 size=16143876096 hidden=1 parent=none
vhd=VHD-975c1983-449c-4021-9843-3a6f5d36f564 capacity=21474836480 size=21525168128 hidden=1 parent=none
vhd=VHD-cb0d1245-2445-455f-bb17-3331172def32 capacity=21474836480 size=21525168128 hidden=1 parent=none
vhd=VHD-d5c21ed0-3970-4ac9-8ce8-70a90f7ce147 capacity=16106127360 size=16143876096 hidden=1 parent=none
vhd=VHD-d6a48e7f-307c-4053-a2f2-f05e6abcab49 capacity=16106127360 size=16143876096 hidden=1 parent=none
vhd=VHD-fc646534-658a-4550-b7e8-f13c6fbfe935 capacity=16106127360 size=16143876096 hidden=1 parent=none
vhd=VHD-6a0e604d-439f-4ec5-85f1-090574cd8cce capacity=26843545600 size=26902265856 hidden=0 parent=none
Step 2: Make a full copy of the VM and delete the old VM. Then check whether the chain is removed from the SR. this process will remove the VHD chain whereas step 3 should be used to remove the Orphan VHDs
Step 3: if step 2 does not reclaim space, then try to remove the Orphan VHD
lvremove /dev/VG_Xenstorage-<uuid_of_SR>/VHD-uuid
For Ex:
[root@XENH3-TEST VG_XenStorage-3a490822-9d03-50ae-01a2-07e8d877bb17]# lvremove /dev/VG_XenStorage-3a490822-9d03-50ae-01a2-07e8d877bb17/VHD-b21c101c-8f66-4202-842a-eb7173bee109
/dev/sdb: read failed after 0 of 4096 at 0: Input/output error
/dev/sde: read failed after 0 of 4096 at 0: Input/output error
Logical volume “VHD-b21c101c-8f66-4202-842a-eb7173bee109″ successfully removed
Note:
The above happens only if the VHD do not have a Symbolic link to it. you can check this by the following command
/dev/ VG_XenStorage-<uuid of ur SR># ls -l
Step 4: Change the hidden VHD to unhidden
vhd-util set -f hidden -v 0 -n <path to vhd file>
Note: to find out the path, type ls –l in /dev/ VG_XenStorage-<uuid of ur SR>
For Ex:
vhd-util set -f hidden -v 0 -n /dev/mapper/VG_XenStorage–99dfb8a9–2dcc–b610–45ca–2010fb0e475b-VHD–6a0e604d–439f–4ec5–85f1–090574cd8cce
Now you will be able to see the VHD in the XenCenter.
Step 5: Now attach the disk to any VM, modify its size and start the VM
Now the disk which was used by dom 0 will be used by the VM
Step 6: Now stop the VM, then deattach the disk and finally delete it
How to delete Orphaned VHDs from Xenserver SR?
Step 1: scan your SR for orphaned VHDs
vhd-util scan -f -m “VHD-*” -l “VG_XenStorage-<uuid_of_SR>” –p
for example:
[root@MytestCase]# vhd-util scan -f -m “VHD-*” -l “VG_XenStorage-99dfb8a9-2dcc-b610-45ca-2010fb0e475b” -p
vhd=VHD-75fa7730-091d-4d6b-bcae-79ae11efa79d capacity=21474836480 size=21525168128 hidden=1 parent=none
vhd=VHD-7ec19bd2-1c86-44c0-83f1-aab4c8bd7e41 capacity=26843545600 size=26902265856 hidden=1 parent=none
vhd=VHD-902f17f1-c254-4cde-8519-a004b8721581 capacity=64424509440 size=64558727168 hidden=1 parent=none
vhd=VHD-94bc9c71-6e33-4281-9c1d-9ecd6f1da4c0 capacity=16106127360 size=16143876096 hidden=1 parent=none
vhd=VHD-975c1983-449c-4021-9843-3a6f5d36f564 capacity=21474836480 size=21525168128 hidden=1 parent=none
vhd=VHD-cb0d1245-2445-455f-bb17-3331172def32 capacity=21474836480 size=21525168128 hidden=1 parent=none
vhd=VHD-d5c21ed0-3970-4ac9-8ce8-70a90f7ce147 capacity=16106127360 size=16143876096 hidden=1 parent=none
vhd=VHD-d6a48e7f-307c-4053-a2f2-f05e6abcab49 capacity=16106127360 size=16143876096 hidden=1 parent=none
vhd=VHD-fc646534-658a-4550-b7e8-f13c6fbfe935 capacity=16106127360 size=16143876096 hidden=1 parent=none
vhd=VHD-6a0e604d-439f-4ec5-85f1-090574cd8cce capacity=26843545600 size=26902265856 hidden=0 parent=none
Step 2: Make a full copy of the VM and delete the old VM. Then check whether the chain is removed from the SR. this process will remove the VHD chain whereas step 3 should be used to remove the Orphan VHDs
Step 3: if step 2 does not reclaim space, then try to remove the Orphan VHD
lvremove /dev/VG_Xenstorage-<uuid_of_SR>/VHD-uuid
For Ex:
[root@XENH3-TEST VG_XenStorage-3a490822-9d03-50ae-01a2-07e8d877bb17]# lvremove /dev/VG_XenStorage-3a490822-9d03-50ae-01a2-07e8d877bb17/VHD-b21c101c-8f66-4202-842a-eb7173bee109
/dev/sdb: read failed after 0 of 4096 at 0: Input/output error
/dev/sde: read failed after 0 of 4096 at 0: Input/output error
Logical volume “VHD-b21c101c-8f66-4202-842a-eb7173bee109” successfully removed
Note:
The above happens only if the VHD do not have a Symbolic link to it. you can check this by the following command
/dev/ VG_XenStorage-<uuid of ur SR># ls -l
Step 4: Change the hidden VHD to unhidden
vhd-util set -f hidden -v 0 -n <path to vhd file>
Note: to find out the path, type ls –l in /dev/ VG_XenStorage-<uuid of ur SR>
For Ex:
vhd-util set -f hidden -v 0 -n /dev/mapper/VG_XenStorage–99dfb8a9–2dcc–b610–45ca–2010fb0e475b-VHD–6a0e604d–439f–4ec5–85f1–090574cd8cce
Now you will be able to see the VHD in the XenCenter.
Step 4: Now attach the disk to any VM, modify its size and start the VM
Now the disk which was used by dom 0 will be used by the VM
Step 5: Now stop the VM, then deattach the disk and finally delete it
Creating VMs from templates or using FAST clone Method in XenServer creates a Link to the Original Disk
Whenever you create a VM from a template in XenServer, it actually generates a FAST CLONE of the disk.
This could have a storage impact because this process will generate a linked VHD clone disk. This means that the VM created from a template will have its disk linked to the template’s disk. If you have an operational process that creates VMs from templates, over time this could create a long linkage tree!
Limitations:
- When this is done excessively, performance could degrade.
- Also if the link breaks anywhere, then all the VMs under the Linkage tree will lose its data.
Workaround from Citrix:
XenServer has a built-in limitation of 30 linked clones to avoid this issue (from the XenServer Administrators guide):
When cloning VMs based on a single VHD template, each child VM forms a chain where new changes are written to the new VM, and old blocks are directly read from the parent template. If the new VM was converted into a further template and more VMs cloned, then the resulting chain will result in degraded performance. XenServer supports a maximum chain length of 30, but it is generally not recommended that you approach this limit without good reason. If in doubt, you can always “copy” the VM using XenServer or the vm-copy command, which resets the chain length back to zero.
Mitigation
As the Admin guide snippet indicates, when excessive linking could be a concern, use the full copy method. To create a new template that is based on an existing template, perform the following for new templates:
Right click template -> copy -> full copy as shown below;

Useful Commands
Command 1:
A good way to determine if you have an excessive tree of cloned VHDs is using the vhd-util scancommand:
# vhd-util scan -f -m “VHD-*” -l VG_XenStorage-<UUID_of_StorageRepository> -p
This will list all of the VHDs in your Storage Repository. The “-p” switch is awesome because it will display the disks in a hierarchical structure:

From this output you can see which disks are fast clones of others. The hidden column tells us which disks will be displayed in XenCenter when you look at the disks in a Storage Repository.
For kicks, you can use the xe vbd-list command to map the disks back to VMs:
#xe vbd-list vdi-uuid=<UUID_of_disk>
The UUID of the disk is what is displayed in the output from vhd-util scan.
Command 2:
You can also use this command to determine the VDIs that is dependent on parent VHD.
# vhd-util scan -f -m “VHD-*” -l VG_XenStorage-<UUID_of_StorageRepository> -p | grep parent=VHD
How to install XenServer Tools on a Redhat VM?
Installing XenTools on Red Hat is very easy;
- Attach the XenTools cdrom by selecting VM-> Install XenServer Tools in Xencenter
- Then login as root and enter your password.
- Mount the iso by issuing “mount /dev/xvdd /mnt“.
- Then type the command, cd /mnt/Linux/
- If your redhat install is i386, issue:
“rpm -Uhv xe**x86.rpm“
On amd64:
“rpm -Uhv xe**x86_64.rpm“
Unmount the cdrom by issuing “umount /mnt”
You will then notice that Suspend and XenMotion functionality will be enabled.
This concludes the steps needed to install a fully functional Redhat server VM on XenServer.
Note:
If you are facing any issue with mounting the CD-ROM with \mnt directory of the VM, then you can manually copy the Linux tools from the Xentools.iso to the Linux VM using the WinSCP.
How to install XenServer Tools on a Ubuntu VM?
Installing XenTools on Ubuntu is very easy;
- attach the XenTools cdrom by selecting VM-> Install XenServer Tools in Xencenter
- Then become root by issuing “sudo su“, then enter your password.
- Mount the iso by issuing “mount /dev/cdrom /mnt“.
- If your Ubuntu install is i386, issue:
“dpkg -i /mnt/Linux/xe-guest-utilities*i386.deb“
On amd64:
“dpkg -i /mnt/Linux/xe-guest-utilities*amd64.deb“
Unmount the cdrom by issuing “umount /mnt”
You will then notice that Suspend and XenMotion functionality will be enabled.
This concludes the steps needed to install a fully functional Ubuntu 10.04 server VM on XenServer 5.6.
Note:
If you are facing any issue with mounting the CD-ROM with \mnt directory of the VM, then you can manually copy the Linux tools from the Xentools.iso to the Linux VM using the WinSCP.
